Switch off the device.
Boot your phone in Download Mode:
- Power off your smartphone completely by holding Power button.
After you’re done using Download Mode and updating your phone you will see the device restarting. If you’ve changed your mind and you don’t want to use Download Mode anymore, then you can press the Power button for ten seconds or Press all keys in same time for ten seconds in order to exit Download Mode. Every time your device gets stuck while you’re using it, you simply need to press the montioned combination keys and the Galaxy phone will reboot in normal mode.
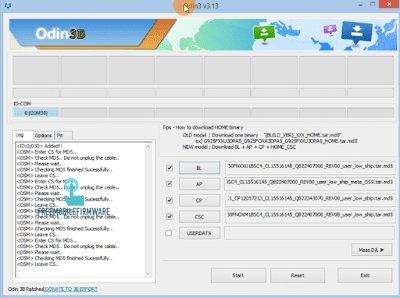
Step 1: Launch the Odin app.
Step 1: Launch the Odin app.
- Connect the phone to PC via USB cable.
- wait for the ODIN app to detect the phone.
- in case your phone is not added when connected, then you can reinstall the Samsung USB drivers.
Step2: On your Odin, select files:
- Click on AP / PDA and select file with AP or Code in its name (this would be the extracted .tar.md5 file)
- Click on CP/Phone and select file with MODEM in its name – ignore if you didn’t get any such file.
- CSC and select file with CSC in its name – ignore if you didn’t get any such file.
- Click on PIT and select the. pit file – ignore if you didn’t get any such file.
- BL and select file with BL in its name – ignore if there is no such file.
- USERDATA If available, use it when you need to arase all your personal data.
You need to know: simply wait until that’s done and the firmware file is loaded. Don’t worry if Odin gets unresponsive for a while, it’s normal. Binary size will also show up in Odin.
Step 3: Make sure Re-partition check box is NOT selected, under the Options tab. Don’t use PIT tab either. Go back to Log tab btw, it will show the progress when you hit start button in next step. Or simply don't change anysitting.
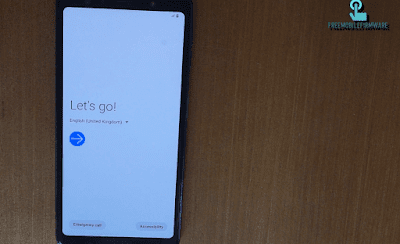
Step 4: Click the Start button on Odin now to start flashing the firmware on your Galaxy. Wait till installation is finished, after which your device will reboot automatically. You’ll get PASS message as shown below upon successful installation from Odin.
 INFO: If the FAIL alert is shown by ODIN app, then you will be forced to repeat the whole tutorial more than once. Make sure that if you repeat installation, then you won’t be skipping any steps and you will make sure that your phone meets all requirements above (download latest firmware by date to avoid odin fail then repeat operation).
 INFO: If the FAIL alert is shown by ODIN app, then you will be forced to repeat the whole tutorial more than once. Make sure that if you repeat installation, then you won’t be skipping any steps and you will make sure that your phone meets all requirements above (download latest firmware by date to avoid odin fail then repeat operation).
NOTE:
If PASS is shown by ODIN, but the phone enters in a boot loop during restart or it gets stuck at the boot animation screen, then you are forced to factory reset your device. Or you need to install latest security firmware in link given above (in download area).


